Wednesday, 29 February 2012

Silent Comedy : Body

After completing the top half of the body yesterday I added the legs and shoes today, this was a lengthy process but I think his long skinny limbs will work well and allow me to produce a funny clumsy character. He also has a kind of indie feel to him, I think I will play with this when I add colour and texture's. Here is another screen shot and render from the build of my character so far.

Screen Shot

 Render
 

Silent Comedy : Character Torso, Arms and Hands

The other day I started to build my character within 3DS Max, so far I have just built the torso, the arms and the hands with fingers. Here are a few screen shot's and a render of him so far.

Screen Shot

 Render

Silent Comedy : Character Sketches

The first step I took in this project was to design a character and produce some sketches, here are the drawing's I came up with and will use to help me model the the character in 3DS Max. 

 Front View
 Side View

New Brief : Silent Comedy

For one of my new project's I have been set the task to design, build and animate a Character that can apparently think, decide, pick something up, drop something, walk, climb, trip, slip and fall. I am not allowed more than two character's and the main focus will be on the character animation itself. The animation must be at least 1 mintue long and is due on the 13th April 2012.

I am excited about this brief as I am finally going to get to design a character. Hopefully I will produce a solid short clip with a strong animation.

Thursday, 9 February 2012

Maya Tutorials

Below is a link to Baris' Tutorials on Vimeo.


www.vimeo.com/user2432106

Friday, 20 January 2012

Flickr

I have been collecting images over the last few months of different textures that I can use for the past projects and future projects to come. Here is a link to a few of the photos... feel free to use some if you like them.

http://www.flickr.com/photos/georgepickles/

Visualisation: Still Life


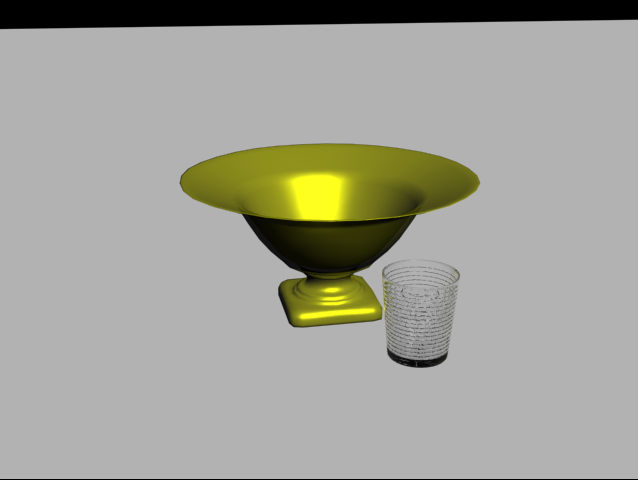
The third of my first three briefs for the module, ‘Design Practise 3’ was a visualisation project called ‘Still Life.’ For this project I had to design, model and render 4 still life scenes using a minimum of 6 objects that I have collected or found.  To aid me with this project I had to study current still life painting and photographs to allow me to get a better concept of the sort of scene I wanted to convey.  I had to think about the location, the objects I wanted to model and the texture of them as well as the arrangement of the objects to find the most pleasing composition. I then had to add a camera and the lighting. Once all these were in place and I was happy with my scene I had to rearrange the scene four separate times to show how the objects worked well together. The software I used for this project was 3DS Max.

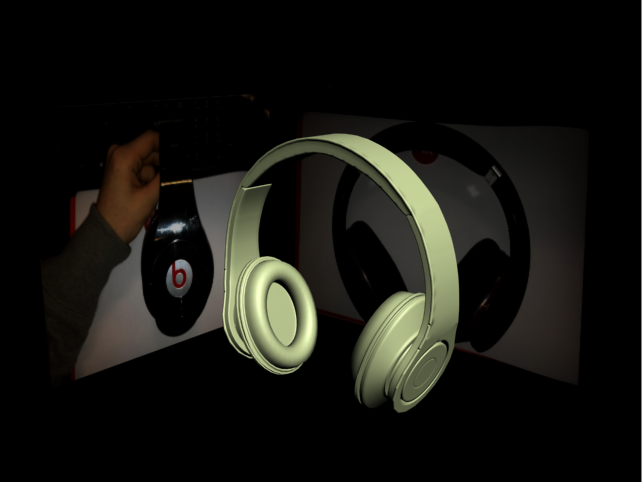
At the beginning of this project I found this task to be daunting because I didn’t feel that my modeling skills would be up to the standard necessary to produce a number of good quality compositions. However, I found that over the past few months my skills have improved vastly. The many seminar sessions taught me many new techniques to model different objects. Which gave me the confidence to model more daring objects such as my headphones and the juicer.

I started this project my studying and researching a number of existing still life scenes.  I then started searching for different items that I thought would challenge my modeling and texturing skills but would also make a delightful composition. At first I wanted to put together a kitchen scene using a many different but unusual kitchen utensils but this was quickly adapted by the addition of the headphones, as I like the organic smooth shape of them. I included a lamp found in my family room from home as it was a good light source and fitted nicely within the arrangement. Other objects that can be found are the place mats, glasses, iPhone and fruit bowl with fruit. All the objects worked nicely together and give a modern, but organic mood and atmosphere, the subtle lighting and lots of reflection also give a sense of a clean and friendly environment. I wanted to portray a joyful and exciting scene and I believe the addition of the modern objects also fit the show the audience who I am as a person, and what I like to do. I am please with the outcome of the texturing works well within the scene however in places I feel the reflection could be a little less subtle but it is simply where the lights react with the smooth shiny surfaces of the objects.

Overall, I enjoyed this project a lot, especially I as I can see a dramatic change in my modeling and texturing skills from last year. I have also received a better understanding of the software 3DS Max which is vital for the career I want to pursue. As I am keen to continue working in 3D where I can model objects to their correct proportions. I am very pleased with my vast improvement over the last year and from feedback I have received, others agree too. I hope you like my final renders and continue giving my critical feedback, as this is what allows me to improve and work harder for my dream. I am very excited about what the next project will bring and the skills I will learn.

Thursday, 8 December 2011

Fantasy Olympics: 500 Word Evaluation

The second of my project’s for the Design Practise 3 module of this year was to think of a futuristic sport and to design an appropriate character or characters to compete within that sport. I also had to think of the location the sport was to be set and the environment that the location would be situated in. However, the software we were to use was one that I had never used before to produce an animation ‘Adobe After Effects.’ The style was to be 2D characters and environment in a 3D world, which took a while for me to get my head around.

At first I found this entire project a bit confusing because of the style but after an example given to us by my lecturer I knew what I was aiming for. It took a while for me to come up with a good futuristic style, which I could creatively pursue. I started with ‘Jet Powered Canoe Lacrosse’ and after a number of trials I alternatively went for ‘Hover Tennis,’ which was to be set in space. I did a number of sketches for different character ideas, including a human, squirrel and beaver. I developed the beaver and squirrel until I was happy with my sketches; I then scanned them into ‘Adobe Photoshop’ and continued developing them. The next stage was the environment where I included a number of planets including the Sun, Saturn and Pluto. There were stands for alien crowds, a clubhouse and commentary box as well as a Referee and scoreboard.

Once I was happy with all the different parts to my animation necessary the next stage was to import it into ‘After Effects’ and position each piece where I wanted them and then to animate. I found the animation side quite difficult as all the keys aren’t on the same timeline but after a few trial runs I started to get the hang of it and was soon able to use the different layers I had created in ‘Photoshop’ for the characters to their full advantage giving them movement in their arms and legs as well as multiple facial expressions giving them a sense of their own personality. I did most this by using the puppet tool and the timeline effectively. I also gave the referee and scoreboard some floating movement making it seem as if they were both hovering just like the characters were. There is tool within the effects panel called ‘Distort’ I used this on the alien crowd and increased the ‘Turbulent Displacement’ so that the crowd waved around also giving them some movement without having to move each one individually.

Overall, I thoroughly enjoyed this project as I have never properly used ‘Adobe After Effects’ before, therefore I was able to explore and learn to effects that I can apply to future animations whether it be of a similar style or even an animation I have produced and then imported from 3DS Max. I feel that learning this software is vital for my future career especially when it comes to compositing, which I am very excited about learning next term. I feel that this project has pushed my skills far beyond what they were before and has therefore has possibly opened a new door for me to consider about my career.

Wednesday, 7 December 2011

Wednesday, 30 November 2011

Fantasy Sport

Recently, I have been developing my environment in After Effects for my Hover Tennis Olympic Sport, I have gone for a futuristic tennis court with neon lines, which hovers. I have simply then created a clubhouse and spectator stands matching the colours of each player. I have also included a tree and planets for an extra scenery effect. 


I have still yet to include a scoreboard, referee, and alien spectators to further develop the futuristic aspect to the advert. I will then animate it and render it out, I hope to have this all done by the end of the weekend. 


Monday, 28 November 2011

Project 2: Fantasy Sport Test 1

This image below is a quick test of me putting the different 2D images I have produced to produce a 3D world. I decided to go for a futuristic neon glow for my idea 'Hovering Tennis' played within a bubble in space. This image is to give you a sense of what my idea is, however I have a long way to go before this will be complete... I have to add crowds, tennis rackets, balls, hover boards, referee, planets and the bubble before I can even animate so I best get cracking... feedback please? 


Saturday, 26 November 2011

Project 2: Fantasy Sport Characters

After a lot of development and sketches which I will upload shortly I have finally design both my characters that will be the face of my olympic sport. The sport however I am still trying to identify exactly what sport I want to do but the characters will fit nicely into the sport. At the moment I am thinking of something along the line of hover tennis or hover lacrosse, or hover basketball but I am not sure of which one I want to pursue. I hope you like my characters, any feedback would be amazing!


Friday, 18 November 2011

The Chess Player: 500 Word Evaluation

The first project I was set this term was to produce a short animation that was at least thirty seconds where a conflicted self-defeating chess playing machine takes place.


At first this project seemed extremely daunting as I felt that I lacked the skills that were required to produce such an animation but over the last six weeks, I have learnt about hierarchy, environmental design e.g. lighting and texturing, as well as the importance of camera angles and sound. It took me a while to get to grips with the rigging of the robotic arm so that it worked exactly like a human arm but after a number of attempts I vastly improved and managed to produce a simple arm with three different types of joints. I included eyes on both my characters as I felt it gave them more of a carton feel and directed the audience’s attention to certain parts within the animation and it gave it a humorous feel. I found the actual modeling of the arm quite simple to put together, using the different tools within 3DS Max allowed me to recreate the arm in 3D to the one I designed on paper.


The next stage of producing my animation was to model the chess pieces. All I knew before was to model them using the ‘Lathe’ tool but after a lecture on modeling I had a better understanding of a new and more advanced technique to produce higher quality pieces, which in the end improved my overall outcome dramatically. I also included eyes on my horses to continue the sense of humor and their own personality.


Another vital part to my animation was the environment. For my animation I wanted to keep it quite simple so that all the attention was focused on the board and the characters, therefore I used an Omni light to act like a spotlight over the game. The texturing I used was to have a classic look for the board and pieces, so therefore I used a marble and polished concrete bitmap to obtain this effect which I believe worked well. As for the arms, I gave one a rusty bitmap with red eyes to represent old and evil and the other a shiny metal bitmap with blue eyes to represent new and good. Both of which I would say are clearly evident for the audiences perspective. I used a number of camera angles, including panning, close-ups and still improved the quality of the animation further and keeps the audiences interested. For the sound I didn’t use much as I felt it was not necessary throughout the animation, however I did include a few which I think enhanced the storyline.


Overall, my skills have improved greatly over the last six weeks and I am exceptionally pleased with the final outcome. I feel the storyline is obvious to the audiences as well as having a comedy twist. I have learnt many things from hierarchy and rigging to modeling and lighting. All of these are vital for the vocation I wish to follow in animated films and advertising as these projects allowed me to gain a better understanding of character and environment design all of which will be relevant for my future career.

Thursday, 17 November 2011

The Chess Player - Final Version

Here is my final version of my animation for the project. 'The Chess Player', Enjoy!


Tuesday, 15 November 2011

The Chess Player: First Render

This is my first render for 'The Chess Player'. I need to add sound and make a few edits in Adobe Premiere Pro until this project is complete, I am not far off though. I hope you get the concept, any feedback would be fantastic!

Wednesday, 2 November 2011

Animated Robot Arm Test

I have added eyes to my robot arm to give it more character. Here is a quick animation I did to get an idea of what the eyes look like and to get a feel on how to animate the arm. There are a few issues I believe, one of which is I need to produce a smoother animation and the other is the light reflecting from the eyes. Take a look and see what you think, any feedback would be fantastic. 

Sunday, 30 October 2011

Chess Pieces and Board

I have spent a lot of time over the design of the board and the pieces. I couldnt make my mind up on whether I wanted to go for a modern unique style or an old antique style. As seen in the image below I decided to go for more of a traditional style as chess is an old game and it just seemed to fit better with the theme I am going for. Here is a render of one of the arms mid-move. Now I have to sort out the texturing, the lighting and then animate. I better draw uo my storyboard first however.