So the hand in of my final project also marks the end of my second year. This means that next year is my final year, which will also be one of the biggest years of my life to date. I will continue blogging over the summer holidays when I start to do research for my client and research projects next year. I look forward to next year even though I know it will be a busy.
Monday, 21 May 2012
Here Ends My Second Year!
Compositing Project - Analysis Of The Production Process
The final project of my second year was ‘compositing’ and it was given
in two parts. The first part I had to take my chrome character from a previous
project and place it within a real life image. The character had to walk behind
an obstacle such as a tree or a coffee mug as if it was always meant to be
there. The scene had to also contain matched aspects of light, shadows,
reflections, colour tone/grain and masking. The second part to the project was
to piece together a composition from the different elements given to me and
then apply at least four different creative effects within Adobe After Effects.
I learnt throughout this project that compositing is vital stage at the
end of the design process as it allows you to easily manipulate how the overall
animation or film looks. This can be from adding simple creative effects such
as noise, colour changes, blurs, distortion or editing, adding or removing
elements within the scene. I found to be useful when compositing both parts of
the project as it allowed me to change the overall look without spending hours
rendering over and over again within 3DS Max. I found that rendering the
different elements separately and then layering them within Adobe After Effects
is a valuable method to editing any scene as it saves time on rendering which
is important when producing a project quickly and effectively for a client.
I also found that you can apply different effects to the different
layers easily such as the ‘glow’ I used on the window’s, in part two, to
emphasise the effect of light shining through them. The other effects I used
were a ‘fast blur’ on the cars and the trail to give them more motion. I used
some noise on the billboards to give the effect of a pixelated screen.
Compositing is a useful skill to have when producing animations simply
for the main reason of time saving, especially if a client chooses to change
something they aren’t happy with or want to add of change something e.g. a logo
or colour.
Overall, I enjoyed this project, I learnt many new skills one of which
is learning more about Adobe After Effects and working with that software. It
is a useful tool for an animator and I can see how it could be utilised for
special effects within the film industry, something I am hoping to explore in
the near future. I would like to extend
my knowledge further in Compositing as I feel that it would be a very useful
skill to have and would leave me with a larger work opportunity in the future.
It is now something I am considering to pursue, as I never thought I would of
enjoyed it as much as I did. I’m sure I have only just touched the surface of
compositing and therefore I would like to go further in depth and find out more
on how to composite different scenes. As the technology improves the
possibilities of merging an animated world and the real World seem endless.
Having now reached the end of second year and going into my final year I will
be working on and thinking about where my future lies and this project on ‘compositing’
has definitely open a new door for me.
Part 2 - Final Compositing Project
Below is the final second part of my project, I have added four
different effects including, fast blur, glows, noise, colour change and
hue and saturation. I put all the elements together in the correct layer
order and this is my final outcome.
Part 1 - Second Render
I sorted the shadows out, they could do with being a littler darker too,
to match the shadows already within the scene, I still need to change
the character to chrome. I'm thinking of starting this project again so I
can improve the final result.
Part 2 - Compositing Test
Compositing test, piecing together animation using lectureres files, making it easier to edit later on if necessary. No effects have been added as of yet.
Part 1 - First Render
The first render of part 1 of my compositing project shows my character
walking behing the mug. However the shadows are very rough so I am going
to change them for a ray traced shadow to make them sharper. I also
need to change the character to chrome so that the room is reflected
within the character to reflect the scene.
Compositing Project: Brief
1. Composite a Chrome Character into a photo or video.
Using a previously created character (from Andy's Bots & Bananas)
Animation of the character will be left to your imagination,
however it must involve some part of passing behind a real world
object.
Render and composite, in After Effects, a 125 frame sequence of
your character within your 'real' environment.
Render elements must be in 16bit .exr format with the final output
as a quicktime h.264. The scene/shot must comprise of at least 2 surfaces [ground & vertical]
and 1 real world obstacle [eg mug/tree].
It must contain matched aspects of light, shadows, reflections, colour, tone/grain, masking
2. Piece together a composition from given elements and apply at least 4 creative effects . Analyse the
production project and write a 500-1000 words article focusing on the production pipeline used and
justifying each aspect of the provided 'render elements' and your methods of composition.
Monday, 23 April 2012
Location, location: Still Render's
Here are four of my Still Render's that I have taken from my scene:

Still 1

Still 2

Still 3

Still 4
Location, location: 500 Word Evaluation
The new
brief I was set was called, ‘Location, location’ for this project I had to design,
model, texture, light and render a sixty second walkthrough of my chosen
location, which is based on a published story or script from a different time
period. The interior location had to be set either in a room in a residence or
monumental space i.e. church, factory or historical building. I would
also have to include all the visual elements such as the furniture and objects
that described within the story. The reason behind this project is to design a
location, as it is important to support the story and the characters. Whilst
undergoing this project it was essential for me to consider the architectural
period, genre, dramatic atmosphere and mood, colour and lighting conditions of
the location.
For this project I chose, ‘Crooks’ Bunkhouse’ from the book
‘Of Mice and Men’ as the location I would model. The reason I chose this book
was because we never learn much from the character himself but we do from the
description within the novel and the object’s that can be found. There are many
objects within the scene such a hame, an alarm clock, boots and medicine
bottles etc. From the description I imagined the room to be made from wooden
panels, have an angled roof with dusty light shining through the cracks and the
window. I also imagined the room to be quite dark with the objects scattered
across the room but neatly placed.
I found this project extremely enjoyable to do as I love
making the object’s look realistic to bring the room to life, making it look
old, used, cold and lonely. I feel my modeling skills have dramatically
improved from the beginning of the last year and the last ‘Still Life’ project
helped me to achieve this, making this project seem somewhat easier. Problems
that I had last encountered during the last project were ones I wanted to work
upon and improve this time, such as the lighting and layout. I feel I have
managed to achieve this by adding the volume effect to a directional light,
which gives the illusion of dust particles being caught within the lights path.
I felt that I managed to create a dark scene that shows what I set out to
achieve, which was a ‘lonely, old negro’ who has many possessions.
Overall, I enjoyed this project, I learnt a number of skills
but one mistake a did learn from was to always backup your work as early in the
project I saved everything directly onto my hard drive and in the end I lost
everything and had to restart the project. I feel that this mistake has taught
me some valuable lessons but in the end I felt that my second attempt was
better than my first, which is something I am proud off. This project will help
me with my future career as it has taught me that the atmosphere and design of
the room is important as it is vital to support a characters mood, environment
and personality. Therefore when I design characters in the future now, I will
also think about the environment that they will live in and how the modeling
lighting and texturing will affect the way character is portrayed.
Location, location: Final Render (With Sound)
I have now added sound to my animation, I used one of the soundtracks that can be found on one of the films. Here is my finished walkthrough:
Location, location: First Render (Without Sound)
Here is my first render, I have added the lighting and placed and textured all of the object's within the scene. Below is the first render without sound:
Location, location: Object's
The next stage was to start modelling the object's, So far I have modelled the alarm clock, Hand Riveter, Shotgun, Knife. Below are a few images of these objects:


Alarm Clock

Hand Riveter

Single Barrelled Shotgun

Knife
Location, location: Started Modelling
This week I finally started modelling the basic layout of the room I will be using, I have made individual panels so that the like can shine through the cracks. I have given it a slanted roof as the the passage specifies that Crooks' bunkhouse leans off of the side of the barn. I have also textured the wood a lightish grey wood as I feel that it gives it a worn and old feel. Below are a few images from my progress so far:


Crooks Bunkhouse 1

Crooks Bunkhouse 2
Friday, 13 April 2012
Silent Comedy: 500 Word Evaluation
This was the fifth project I have been set this year and by far the most challenging. The brief I was given was to design, build and animate a Character that can apparently think, decide, pick something up, drop something, walk, climb, trip, slip and fall. At most two characters may be involved in the piece, and the primary focus will be the Character Animation itself. It is suggested than only a limited "set" be designed for the film, as the majority of the artist's time should be spent on the development of the character(s), making them into believable on-screen entities.
At the beginning of the project I found the idea of having to build a character and rig it quite daunting as I thought it would be a major struggle and a very time consuming process. However I did find it quite easy especially the building as I developed my skills dramatically with the software since the beginning of the year. The process was still time consuming but I found this to be a positive aspect of the process as it meant my design would be a perfect as I could make it. One I had designed the character I found the toughest part of the process was the UVW Unwrapping it took me a while to get it done but it all paid off in the end and this was the same for the rigging too.
The next step was to design the environment the character would act in. As the brief suggests, we should stick to a simple environment and focus on the character and so this is what I did, I made a simple room with one window and then used an omni light to add light and shading within my scene. I found this to be effective as it kept all the attention on the character and his actions. Although the storyline wasn’t very strong I think it keeps the audience interested and from the people I have shown the clip to, they have all laughed at the end, which is a good sign for any comedy.
Overall I am pleased with my final outcome and the new skills I have learnt as well as the ones I have developed. I now know how to build, unwrap, rig and animate a character effectively. There as a few changes I would of liked to of changed if I had more time such as the sound’s I have added, although some are very effective, other’s just don’t seem to fit as nicely as I would of liked them to. The overall outcome is something I am pleased with and is an animation I could develop and improve. This particular project is perfect to help me with my future career choice as I character animation is the field I wish to progress into as it excited me the most. I feel like I can now continue to produce more character’s and build a larger portfolio for myself.
Silent Comedy : First Render (No Sound)
My first render, whcih needs a few changes and sound adding, but on the whole I am reasonably happy with this animation.
Silent Comedy : Character Walking
Here is the intro to my animation. I have keyframed his walk and constrained the ladder and toolbox to his hands. I am pleased with my first walk cycle I hope you enjoy it too!
Silent Comedy : UVW Unwrap Template
Teh first image is my UVW Unwrap Template that I produced by cutting up my character to be able to lay him on a flat page so that I can paint him using photoshop or Autodesk Mudbox. Below the first image is my coloured template which I will then apply to my character, I touched it up in photoshop to get a better quality image but I mainly used Mudbox to paint the chracter.


UWV Template before being painted

UVW Template Coloured
Tuesday, 20 March 2012
Pirate Camp: My 500 Word Evaluation
This is the fourth project I have undertaken this year for the module, ‘Design Practise 3’. The brief given to me described that I must use my creative skills to produce a dynamic pirate camp that has at least 3 procedurally animated components or environmental effects in it. When designing and animating I had to think about articulation, presentation, timing, camera shots, texturing and lighting. I had to produce the animation using new software to me known as ‘Autodesk Maya’, although we were allowed to model in ‘Autodesk 3Ds Max’. By the end of this project I had to produce a 30 second long animation demonstrating these skills as well as the ability to pick up knew software efficiently.
At the beginning of this project I found it quite daunting as I found Maya confusing compared to 3Ds Max but after spending some time on the software I soon picked it up and even found myself being able to model a few of the object’s in my scene within Maya. The many seminar session’s and tutorial video’s helped with the development of my skills, which gave me more confidence with the software to produce a simple, good and strong animation.
I started this project by producing a number of initial sketches of my ideas and layout’s to get a visual understanding of how I want my camp to look. Once this was done I was able to develop these sketches into more detailed drawings. I also drew all the components separately adding extra details to so when it came to modelling them I knew exactly how I wanted everything to look and where it should be placed in the scene. The next step I took in my process was to start modelling, some of which was done in Maya and the rest in 3Ds Max and then I added textures.
The 3 dynamics I chose to do were ncloths for the washing line and flag, and dynamic particles for the fire and rain. I found these quite simple to do after a slow process picking up how to do it; I found the best thing to do was to just change the settings until I had the effect I wanted.
Overall, I enjoyed this project and learning new skills, I found it particularly useful learning the new software within a short period of time, as this is something that I will have to do when I am actually working in the industry. I am very pleased with my final outcome, what I like about my own work is the camera movement and essential shot’s. There are some dislikes I have however which are that I feel I could of improved the fire as it is a little to tame considering the ‘storm’ that it supposed to be happening and I also believe that the rain could still be more visible. The entire outcome is something I am proud of and I can see myself going down the compositing and CGI route as a career so it was nice to get a good incite into what can be done in this side of the industry and could be something I like to continue to focus on. I look forward to producing more animation within Maya and developing my skills.
Pirate Camp: Final Render (With Sound)
I have added sound to my final render which I feel really set's the scene. Overall I am happy with my final outcome with more time there are improvement's I would of liked to of made which I will talk about in my 500 word evaulation, which will follow in my next post. Below the video are the 3 High Resolution Render's I took from my scene that I believe show this particular project at it's best. I enjoyed this project very much and look forward to producing more work within Autodesk Maya in the new future.


Final Video

Render 1

Render 2

Render 3
Pirate Camp: Third Render (No Sound)
Below is another render where I have made some changes. I changed the size of the rain drops again because I thought they were too large. I made them 'Streak;' and simply enlarged the size of the. I am happy as this to be my final render, all I have to do now is add some ambient sounds.
Pirate Camp: Second Render (No Sound)
Below is my second render I have made a few changes such as the expression to slow the flickering fire down to every 3 frames instead of every frame. I have also increased the number of rain drops, and changed them to multistreak as I felt it gave more of a thunder storm effect.
Pirate Camp : First Render (No Sound)
Below is the first render I did, it was surprisingly faster than 3Ds Max and roughly took 30 minutes from start to finish. I am pleased with this render however I feel that the rain isn't very visible so I need to change this. Also the 'Point Light' is flickering too fast to give the fire flicker effect so I want to add an expression to slow this down. Below is the first render:
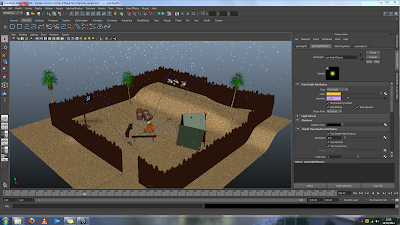
Pirate Camp Screenshots
I took some screenshots that I have taken whilst modelling my camp, they show the layout I wish to use in a 3D model as well as my progress so far. Below are the screenshots:


Screenshot 1

Screenshot 2
Pirate Camp Sketches & Development
The first step I took in this project was to sit down and sketch some designs of my initial ideas and then to develop them, I also sketched the different object's I want to be seen within my scene as well as the layout (including the camera pathway). I did a storyboard to help me animate my camera too. Other sketches also include essential shot's I want to include within my 30 second clip. Below are the sketches I have drawn:


Layout

Initial Sketch

Whole Scene

Component's 1

Component's 2


Storyboard
Pirate Camp Brief
The brief that I have been set as one of my project's this term is to produce a Pirate Camp using a new software to me know as Autodesk Maya. I have never touched this software before but I am eager to learn how to use it. The aim of this project is to build a Pirate Camp that contain's 3 Dynamic effects, e.g wind, fire, rain, snow, hail etc.
My first thought's on this project are to keep it simple as Maya is new to me, but to use the skills I have learnt from 3DS Max to build, light and render my scene. I want my camp to contain flags flapping in the wind, a burning fire and either rain or hail.
My first thought's on this project are to keep it simple as Maya is new to me, but to use the skills I have learnt from 3DS Max to build, light and render my scene. I want my camp to contain flags flapping in the wind, a burning fire and either rain or hail.
Sunday, 4 March 2012
Visualisation, Location location: Moodboard
I put together moodboard of the many different item's that are described to be within Crooks' room. When choosing the images I was very precise in what style and look I was going for as I wanted them to be similar to the ones I imagined when reading this passage. I have also included a few images of the textures I feel that would be found within his room as well as an idea of the colour scheme. Below is the moodboard I put together:


Visualisation, Location location: The Story and Room I Have Chosen.
The book that has inspired me to model a particular room is John Steinbeck's, 'Of Mice and Men'. The book was published in 1937 and is based within an American Ranch. The particular section I have chosen is a detailed description about a character known as 'Crooks' and his bunk. Here is the paragraph I will be using to help me model a detailed image of the room:
Crooks, the Negro stable buck, had his bunk in the harness room; a little shed that leaned off the wall of the barn. On one side of the little room there was a square four-paned window, and on the other, a narrow plank door leading into the barn. Crooks’ bunk was a long box filled with straw, on which his blankets were flung. On the wall by the window there were pegs on which hung broken harness in process of being mended; strips of new leather; and under the window itself a little bench for leather-working tools, curved knives and needles and balls of linen thread, and a small hand riveter. On pegs were also pieces of harness, a split collar with the horsehair stuffing sticking out, a broken hame, and a trace chain with its leather covering split. Crooks had his apple box over his bunk, and in it a range of medicine bottles, both for himself and for the horses. There were cans of saddle soap and a drippy can of tar with its paint brush sticking over the edge. And scattered about the floor were a number of personal possessions; for, being alone, Crooks could leave his things about, and being a stable buck and a cripple, he was more permanent than the other men, and he had accumulated more possessions than he could carry on his back. Crooks possessed several pairs of shoes, a pair of rubber boots, a big alarm clock and a single-barreled shotgun. And he had books, too; a tattered dictionary and a mauled copy of the California civil code for 1905. There were battered magazines and a few dirty books on a special shelf over his bunk. A pair of large gold- rimmed spectacles hung from a nail on the wall above his bed.
Visualisation, Location location: The Brief
For this project I have to design, model, texture, light and render a 60 second walk through of a location of my choice. The location must be chosen from a published story or script fro a different time period. The interior location should be set either in a room in a residence or monumental space i.e. church, factory or historical building. I will need to include all the visual elements such as the furniture and objects that are described in the story.
Wednesday, 29 February 2012
Silent Comedy : Body and Head
Today I have been doing my best to complete the actual build of the character before I start to add colour and paint him. I still need to add the eyes but I have completed the head, he looks as similar to the sketches as possible and I am reasonably pleased with my outcome although there are a few adjustments I have to make. Here are the screen shot's and render's of the complete character.

Screen Shot

Render 1

Render 2

Render 3
Silent Comedy : Body
After completing the top half of the body yesterday I added the legs and shoes today, this was a lengthy process but I think his long skinny limbs will work well and allow me to produce a funny clumsy character. He also has a kind of indie feel to him, I think I will play with this when I add colour and texture's. Here is another screen shot and render from the build of my character so far.


Screen Shot

Render
Silent Comedy : Character Torso, Arms and Hands
The other day I started to build my character within 3DS Max, so far I have just built the torso, the arms and the hands with fingers. Here are a few screen shot's and a render of him so far.


Screen Shot

Render
Silent Comedy : Character Sketches
The first step I took in this project was to design a character and produce some sketches, here are the drawing's I came up with and will use to help me model the the character in 3DS Max.

Front View

Side View
New Brief : Silent Comedy
For one of my new project's I have been set the task to design, build and animate a Character that can apparently think, decide, pick something up, drop something, walk, climb, trip, slip and fall. I am not allowed more than two character's and the main focus will be on the character animation itself. The animation must be at least 1 mintue long and is due on the 13th April 2012.
Thursday, 9 February 2012
Friday, 20 January 2012
Flickr
I have been collecting images over the last few months of different textures that I can use for the past projects and future projects to come. Here is a link to a few of the photos... feel free to use some if you like them.
http://www.flickr.com/photos/georgepickles/
http://www.flickr.com/photos/georgepickles/
Visualisation: Still Life
The third of my first three briefs for the module, ‘Design Practise 3’ was a visualisation project called ‘Still Life.’ For this project I had to design, model and render 4 still life scenes using a minimum of 6 objects that I have collected or found. To aid me with this project I had to study current still life painting and photographs to allow me to get a better concept of the sort of scene I wanted to convey. I had to think about the location, the objects I wanted to model and the texture of them as well as the arrangement of the objects to find the most pleasing composition. I then had to add a camera and the lighting. Once all these were in place and I was happy with my scene I had to rearrange the scene four separate times to show how the objects worked well together. The software I used for this project was 3DS Max.
At the beginning of this project I found this task to be daunting because I didn’t feel that my modeling skills would be up to the standard necessary to produce a number of good quality compositions. However, I found that over the past few months my skills have improved vastly. The many seminar sessions taught me many new techniques to model different objects. Which gave me the confidence to model more daring objects such as my headphones and the juicer.
I started this project my studying and researching a number of existing still life scenes. I then started searching for different items that I thought would challenge my modeling and texturing skills but would also make a delightful composition. At first I wanted to put together a kitchen scene using a many different but unusual kitchen utensils but this was quickly adapted by the addition of the headphones, as I like the organic smooth shape of them. I included a lamp found in my family room from home as it was a good light source and fitted nicely within the arrangement. Other objects that can be found are the place mats, glasses, iPhone and fruit bowl with fruit. All the objects worked nicely together and give a modern, but organic mood and atmosphere, the subtle lighting and lots of reflection also give a sense of a clean and friendly environment. I wanted to portray a joyful and exciting scene and I believe the addition of the modern objects also fit the show the audience who I am as a person, and what I like to do. I am please with the outcome of the texturing works well within the scene however in places I feel the reflection could be a little less subtle but it is simply where the lights react with the smooth shiny surfaces of the objects.
Thursday, 19 January 2012


Subscribe to:
Posts (Atom)