Tuesday, 24 May 2011
Visual Essay - I am choosing my Pathway because...?
This is my Visual Essay which was the 2nd of my two Context 1 Assignments set for me this year at Nottingham Trent University. The aim was to show which one of these 3 pathways , Interactive Media, Virtual Environments and Moving Image I will continue next year. The media I chose to do the essay on had to correspond with my decision.
Overall I feel that I have created a strong Visual Essay that clearly states which pathway I have chosen, with some help form the 5 practitioners that I chose. I think i could of my quite a few improvements but unfortunately either my skills or resources did not allow me to do so However, I would definitely would like to improve the voiceover and maybe I will do so in the future.
I hope you enjoy it and I would appreciate any feedback you may have.
Sunday, 22 May 2011
Visual Essay: With Sound...but does it need to be edited?
Below is another version of my Visual Essay, I have added the voice overs but I still have some more sound to add. I am not too happy with the voice overs so i think I am going to have to re do some of them again. However, as you can see the essay is going well so far but I still have many improvements to make. I would be grateful for any feedback or changes that you think I could make.
Saturday, 21 May 2011
Visual Essay: Animation With Some Sound
Below is the final render of the animation I will be using for my Visual Essay with some sound. I have added the voiceovers, at the moment I am not happy with them, I don't know whether it is because I don't like hearing my own voice played back to me or the quality of the recording. I think that I am going to re-record some of the voiceovers that I am unhappy with, any other feedback anybody may have, just comment I would be very grateful.
Visual Essay Trial
Here is my fist trial render, although i haven't added lighting, sounds, textures, images and text, I just wanted to see what I had done so far so I know where to go next with the essay. As you can see it is coming together but still needs a lot of work doing to it.
Tuesday, 10 May 2011
Visual Essay: Update
Over the last few days, I have a great deal of time designing and preparing my Visual Essay; I have made considerable progress and am pleased with the work I have completed so far. I have designed every inanimate object that I will be using and I have started animating the camera. Furthermore, I have also started to collect a number of images that I will be using; however, I am still unsure whether I want to use a voice over or use text to portray the context of the essay? To conclude, I now have to complete the animating of all final objects, camera movement and add the materials. I will then have to render the animation which I think will take about a day. Finally, I will add all the images and text and/or voiceover using Adobe Premiere Pro. Below are a few images that I wish to share with you of my animation so far.


Three doors which represent the three pathways, after entering the two I do not want to continue they are boarded up.

Virtual Environments (My Bedroom)

Virtual Environments (My Bedroom)

Virtual Environments (My Bedroom)

Virtual Environments (My Bedroom)

Interactive Media

Interactive Media

Moving Image

Moving Image

Moving Image

Moving Image

Moving Image

Moving Image
Friday, 6 May 2011
Animation: Completed Haunted Ride
This is the final version with sound of my Haunted Ride.
My final project of the year was in Virtual Environment’s; the brief was to design and build a haunted ride with at least 3 scare scenes and suitable to fit within the Waverly Theatre. Initially, this project seemed daunting to me as I did not feel that I had enough understanding of the software (3DS Max) to be able to create a ride that would be effective as well as scary. However, after acquiring inspiration from the moodboard I produced and also sketching possible designs ideas, I began to gain confidence in my ability to utilise the software successfully and build an interesting haunted ride.
I intended to maintain the suggested them of a haunted mansion and graveyard. I began by drawing up designs of coffins, gravestones, a mansion, falling skeletons, swinging blades and a variety of cart ideas. I soon realised that my designs were far too complex and intricate for the limited skills that I have; however, I did not let this prevent me from attempting to create these designs. I started searching online for tutorials that would allow me to fulfil my visual ideas and I slowly began to piece together my ride. I found ‘trial and error’ played a large part in the project; many features I would liked to have included, such as rain, I simply did not have the knowledge to execute. Features that I did manage to include were fog, flames for the candles and flashing lights for lightening. I feel that I have progressed significantly since the beginning of the year and the ‘TV Ident’ project.
Overall, I am pleased with what I have achieved as I feel that I created 3 ‘scare scenes’ that are good quality, and also incorporate numerous textures to give my haunted ride a realistic atmosphere. The fog gives is intended as pathetic fallacy and to help enhance a cold and spooky experience; moreover, it aids to blur the audiences vision so you they do not know where the next scare is going to come from. I am also satisfied with my cart design, as I believe the idea of using a coffin was unique and adds a sense of terror. I included my logo from Interactive Media as I felt that the name worked lucratively with the ride; the colours were adapted to fit with the theme.
I had number of issues with rendering and the length of time this process took, however, I persisted and I believe I finally had a render that I could be proud of. I found adding sound using Adobe Premiere Pro relatively undemanding and I feel that the sounds enrich the ride by appealing to the audiences senses.
I have learnt a vast amount whilst completing this project. This has led me to confirm my decision to continue Virtual Environments next year and therefore to create a ‘Visual Essay’ based upon this pathway. I am now very excited and look forward to the next two years studying Virtual Environments.
Animation: Haunted Ride Final without audio
Below is the final render of my animation, I have taken into account most of the feedback I have received and made some changes. I have also included the logo that I used for my Interactive Media project and edited it to fit the theme for this animation. Hopefully you will agree with me that this version of the animation is a vast improvement from the first. Now all I have to do is add some sound, which I will post in my next blog.


Thursday, 5 May 2011
Visual Essay: Storyboard
After writing up my plan for my Visual Essay I felt that it was important to draw up a storyboard so that I can get the image that I have in my head, down on to paper. They are only quick sketches and show very little detail but I feel that they show my vision and they will help me to stay organised as I work. I hope they give you an in sight into my idea and fingers crossed it will all come together nicely.


Wednesday, 4 May 2011
Animation: 2nd Haunted Ride Test Render
The feedback I have received has led me to make some changes; I have increased the density of the fog and slowed the flickering lights as they were flashing too fast for the audience to identify exactly movements and events. I have also received positive feedback about the scenery and the number of scares that I have included. Below is the updated version, however I still feel improvements can be made as I still intend to add the effects of thunder and lightening.
Animation: Haunted Ride Test Animation
I have completed a test render to see the effects of my animation so far; this will allow me to make amends to any problems that may be occurring. Below is the rendered animation, I would appreciate any feedback that anybody can give me so that I can improve my ride.
Animation: Haunted Ride Rendered Images
Below are four images of the rendered objects I have designed as well as adding materials to each object. I have tried my best to make each object look as realistic as possible by assigning the correct material.

The Cart.

Part of the Entrance.
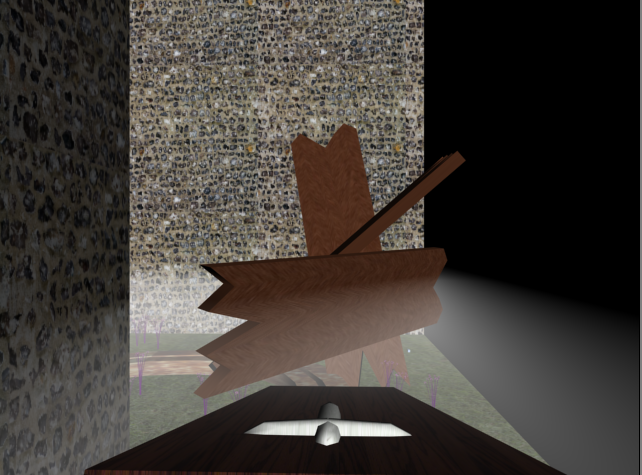
The wooden planks after being pushed out of the way.

This Blade
Animation: Haunted Ride
For my animation, I have decided to create a haunted graveyard where the audience will come across a number of scares, such as a falling trees, blocked pathways, jumping zombies, falling blades and flashing lights. Some of the main objects included in the animation will be coffins and gravestones. Below are a few screenshots that I have taken whilst producing my Haunted Ride animation, these images are without any materials added.

This is a screenshot of 3Ds Max as I see it when designing my animation.

This is the cart I have designed, it is a coffin that I have adapted to look like a cart, I plan to add a wooden material to it.

Above is the blade that moves up and down quickly up and down. I plan to add a bloody material to it.


The above two images are a few of the gravestones I plan to place into my animation, each will have its own material, for example, marble, stone and wood.
Visual Essay: Plan
Introduction
- Starts outside the room with one single door.
- The title of the essay ‘Visual Essay by George Pickles’ appears out of the wall.
- Enter through the first door, into the hall.
- Presented in front of you are 3 doors titled ‘Moving Image’, ‘Virtual Environments’ and ‘Interactive Media’.
- Text will appear that displays the question that I intend to answer by the end of the visual essay, ‘Which Pathway Will I Choose?’
Interactive Media Room
- As you enter this room you will see HTML in large font bouncing around the room.
- A computer will be placed on a desk in the middle of the room, along side a chair.
- The camera will zoom up to the computer screen, which will display information and images to do with Interactive Media and why I believe that it is not for me.
- The camera will zoom out of the screen and on to a keyboard, which will have all the keys missing apart from the letters that spell the word ‘Monotonous’.
- Leave the room and the door to this room will now be boarded up.
Moving Image Room
- Access the door to this room, in front of you will be placed a 3 tungsten lights, a camera and a pile of videotapes and a projector.
- The lights will be setup and the tapes will fall over.
- The camera will zoom up to the projector, which will provide my thoughts on ‘Moving Image’ as well images and my first practitioner.
- Zoom away from the projector.
- Leave the room and the door to this room will now be boarded up.
Virtual Environments Room
- As you enter this room the first noticeable thing you will realise is that there is more furniture, as it will be setup like my bedroom to show that, ‘Virtual Environments’ is for me.
- In this room there will be a desk, cupboard, bed and an Armchair. Placed in this room will also be an iPod, Laptop, T.V. and toy buildings.
- Zoom the camera onto the toy building blocks where information will be presented about ‘Archiform’, which is my 2nd practitioner.
- Zoom out of the buildings on the iPod, where information and images will be provided about my 3rd practitioner I have chosen from the trip to London.
- Zoom out of the iPod on the laptop screen where my information and images will be shown about my 4th and final practitioner as well as why I enjoy doing Virtual Environments.
Evaluation
- Zoom out of the laptop screen on the T.V. where screenshots of my work that I have done throughout the year will be shown. I will also include a few sentences to conclude my decision.
I may also include a voice over and/or music tracks as well as a few sound effects.
Props
- Doors
- Window
- Camera
- Tungsten Lights
- Projector
- Videotapes
- Large Font
- Computer
- Desk 1
- Chair
- Keyboard with unique lettering
- Bed
- Cupboard
- Desk 2
- T.V.
- iPod
- Toy Buildings
- Laptop
Subscribe to:
Posts (Atom)